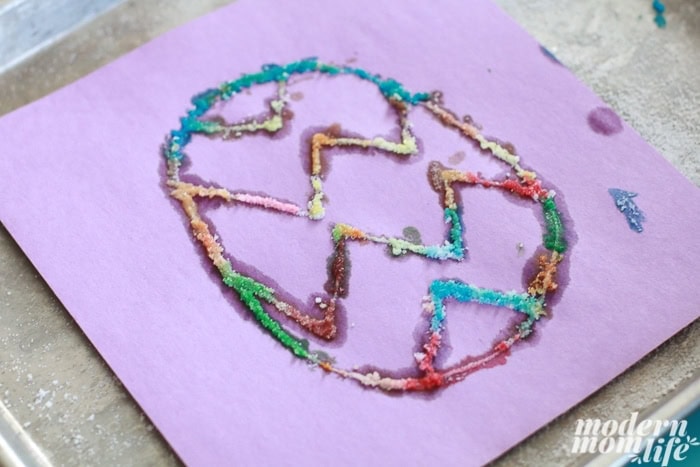
Get crafty this Easter with our Salt Painted Easter Eggs guide. A fun, engaging activity that is perfect for kids and adults alike. Enhance your creativity and motor skills while adding a colorful touch to your Easter celebrations!

Please note that I make a small commission on my affiliate links when you make a purchase. This is at no additional cost to you. Thank you for your support!
Have you ever tried salt painting? It’s a lot of fun and not complicated. See the full instructions below.
Making an Easter egg watercolor salt painting is a fun activity to do with kids as young as three years old. I know this because my daughter was focused and entertained with this activity for well over 20 minutes last year when we made one. That’s a long time for a child who gets bored easily.
Salt Painted Easter Eggs: A Fun Easter Craft for Kids
Grab glue, salt, and watercolors for a super easy craft idea. Watching the salt change colors is pretty amazing too!
What supplies do you need to do watercolor salt painting?
- Watercolor paints – either liquid watercolors or watercolor cakes
- Table salt
- Cup of Water – to clean your brush between colors.
- Paintbrush
- Elmer’s White Glue
- Construction Paper
- Cookie Sheet or use something disposable like these.

How to make Salt Painted Easter Eggs
1. Draw the Design
Start by having your child draw their design on paper or cardboard using white glue. They can create zigzags, polka dots, stripes, or any pattern that comes to their mind. Encourage them to be as creative as they want!
Tip: Place your paper inside your cookie sheet to contain the mess.
2. Sprinkle Salt
While the glue is still wet, immediately sprinkle table salt over it. Ensure the salt covers all the glue lines.
Then, shake the excess salt off the paper. Let it fall into the cookie sheet or back into your bowl. Combine salt and glue to create a colorful puffy paint-like shape! Your artwork should look similar to the photo below covered in salt.
3. Paint the Picture
Once the glue and salt design is completely dry, it’s time to start painting. Dip a paintbrush in watercolor paint and lightly touch it to the salt lines. Watch as the color spreads across the salt, creating a beautiful effect.
4. Let It Dry
Finally, once your child has finished painting their salt painted Easter egg, let it dry completely.

Easter Egg Salt Painting Options
There’s plenty of creative ways to make Easter art with salt painting:
Take advantage of free printable Easter egg templates. After printing out the templates, put a little bit of white glue on different areas of the egg. Then, sprinkle on your salt and shake off the excess before painting with bright colors.
Use paper plates or heavy cardboard instead of construction paper for the Easter Egg.
The Benefits of Salt Painting
Salt painting is more than just a fun activity. It also offers several benefits for children. First, it encourages creativity and imagination as children come up with their designs and choose their colors. Second, it helps develop fine motor skills as children carefully apply the glue, sprinkle the salt, and paint their designs. Lastly, it provides a sensory experience as children feel the texture of the salt and see the colors spread and mix in unexpected ways.
Conclusion
Salt painted Easter eggs are a wonderful project to do with children in the lead-up to Easter. It’s a fascinating process to watch. They’re so much fun to make and offer a unique sensory experience. Plus, the result is a beautiful piece of art that kids can be proud of! Happy crafting and happy Easter!
More Easter Activities for Kids
- Shaving Cream Easter Eggs
- Peeps Playdough
- Easter Story Snack Mix – includes a free printable tag that explains the true meaning of Easter.
- Make Easter Bunny Cinnamon Rolls for breakfast!
- Play Easter Bingo or iSpy
- Salt dough Easter Eggs
SHARE ON SOCIAL MEDIA
Looking for more free Easter printables, and Easter crafts? Make sure to follow us on Instagram and Pinterest for more fun Easter activities and free printable games.


Leave a Reply